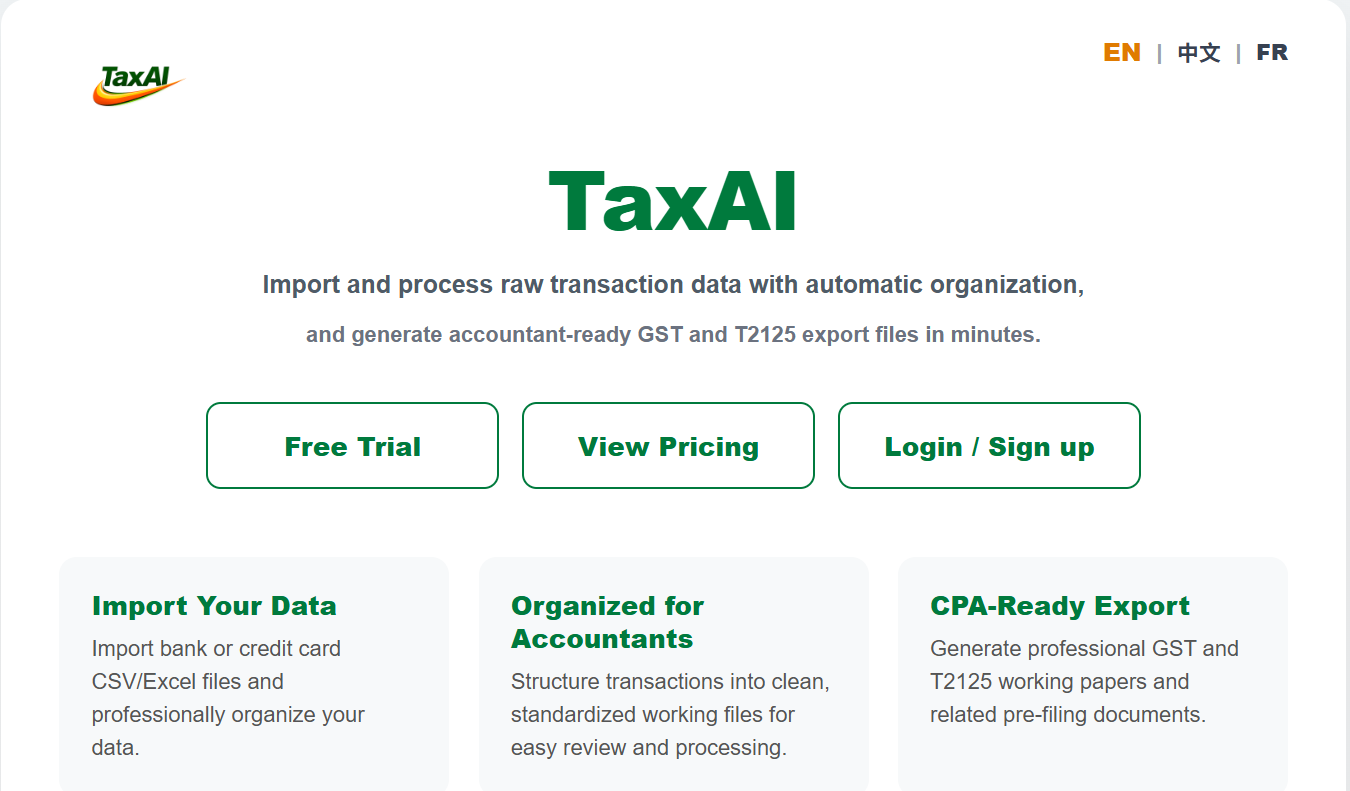
What is TaxAI
TaxAI is a smart tax data organization tool that helps users quickly organize pre-filing data. It turns scattered, messy data into cleaner, more structured working materials.
What it solves
Messy pre-filing data, inconsistent formats, and time-consuming manual organization. TaxAI helps you summarize, organize, and process faster.
Who it’s for
Self-employed individuals, small business operators, and accountants preparing client tax materials.
Supported regions
TaxAI currently supports Canadian regions listed in the Setup page. If your region is not listed, some features may not apply.
TaxAI Workflow Overview
Click + to explore each step in detail
- Tap Register
- Enter valid email & details
- Email verification (6-digit code)
- Log in
- Choose a plan
- Complete payment
- Enter client list
- Save
- Select client
- Select identity menu
- Enter basic info
- Enter upstream info
- Enter downstream info
- Save
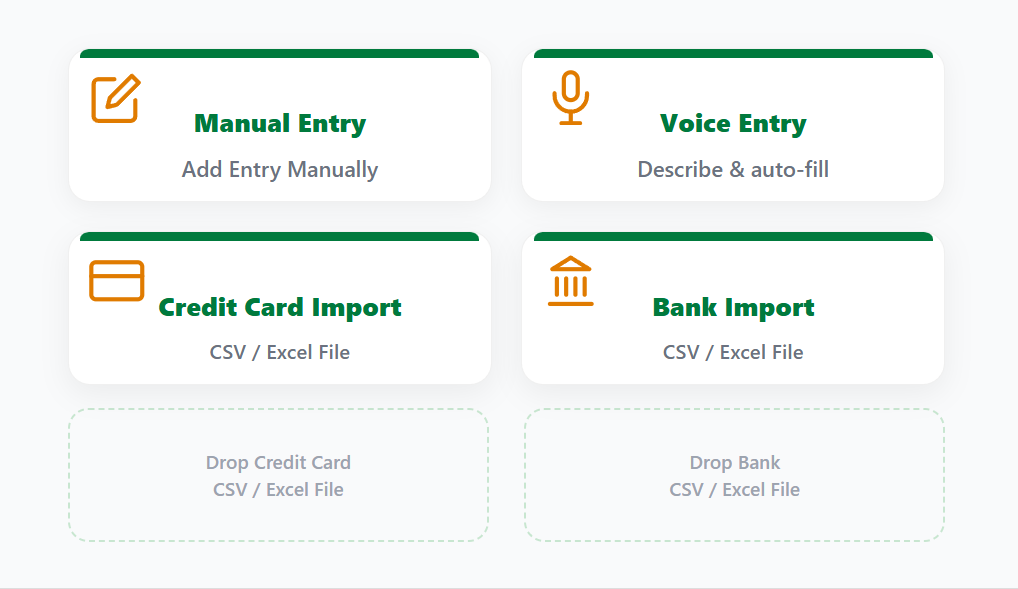
- Manual Entry — fill transaction details, optional photo receipt
- Voice Entry — dictate transaction, system auto-fills
- Photo Import (OCR) — snap receipts, auto-extract date / merchant / amount / tax; refunds detected automatically
- Credit Card CSV / Excel — match columns, generate TA file
- Bank CSV / Excel — match columns, generate TA file
- PDF Statement — client-side grid picker; column mapping shared with CSV
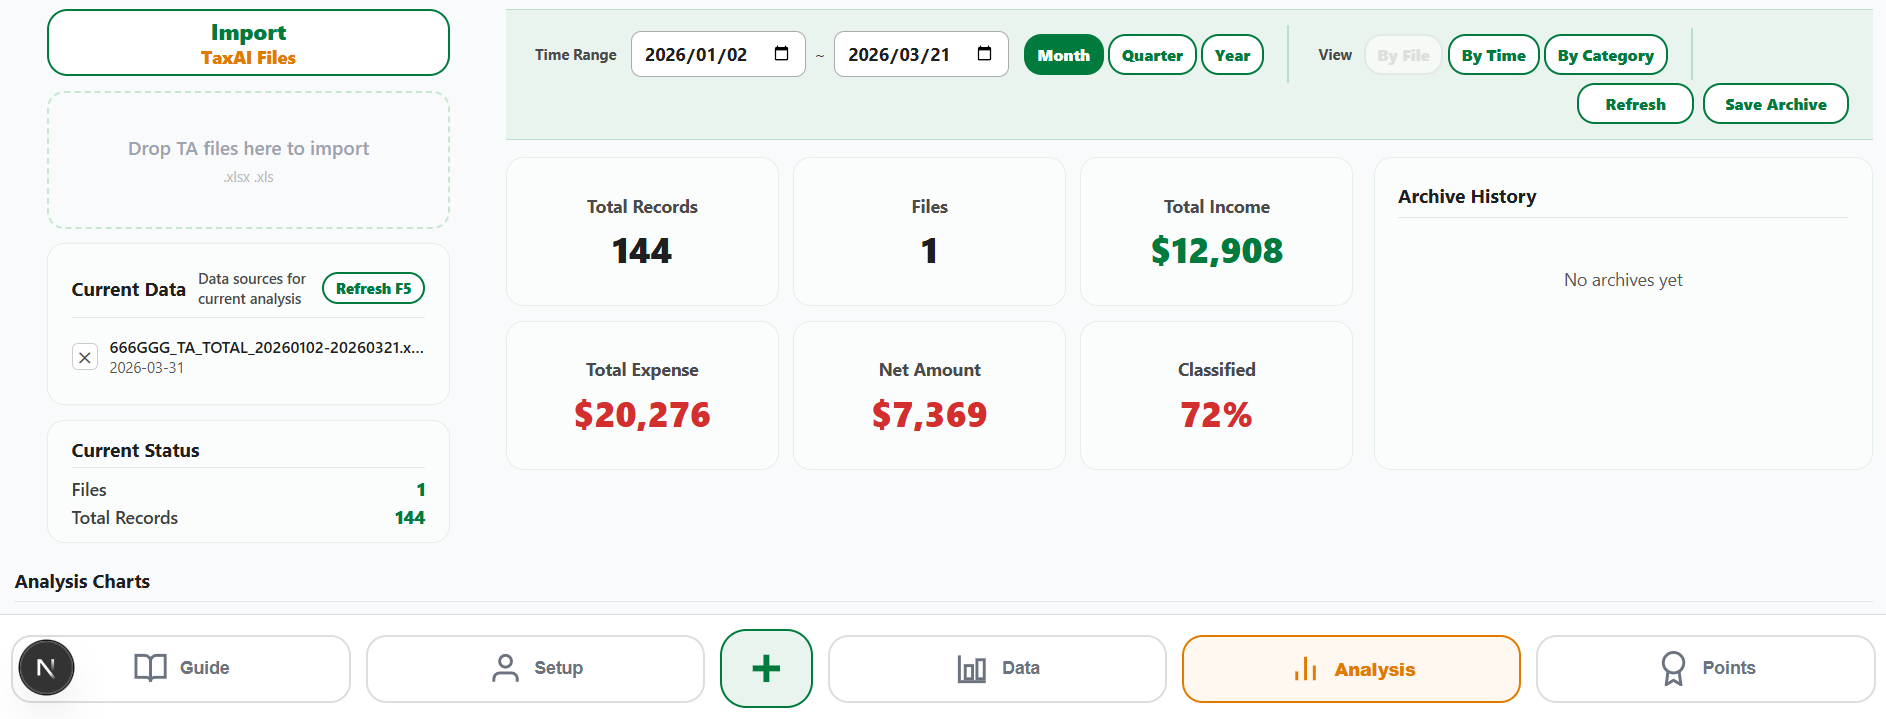
- Data summary (credit card + bank)
- Generate working papers
- Organize working papers
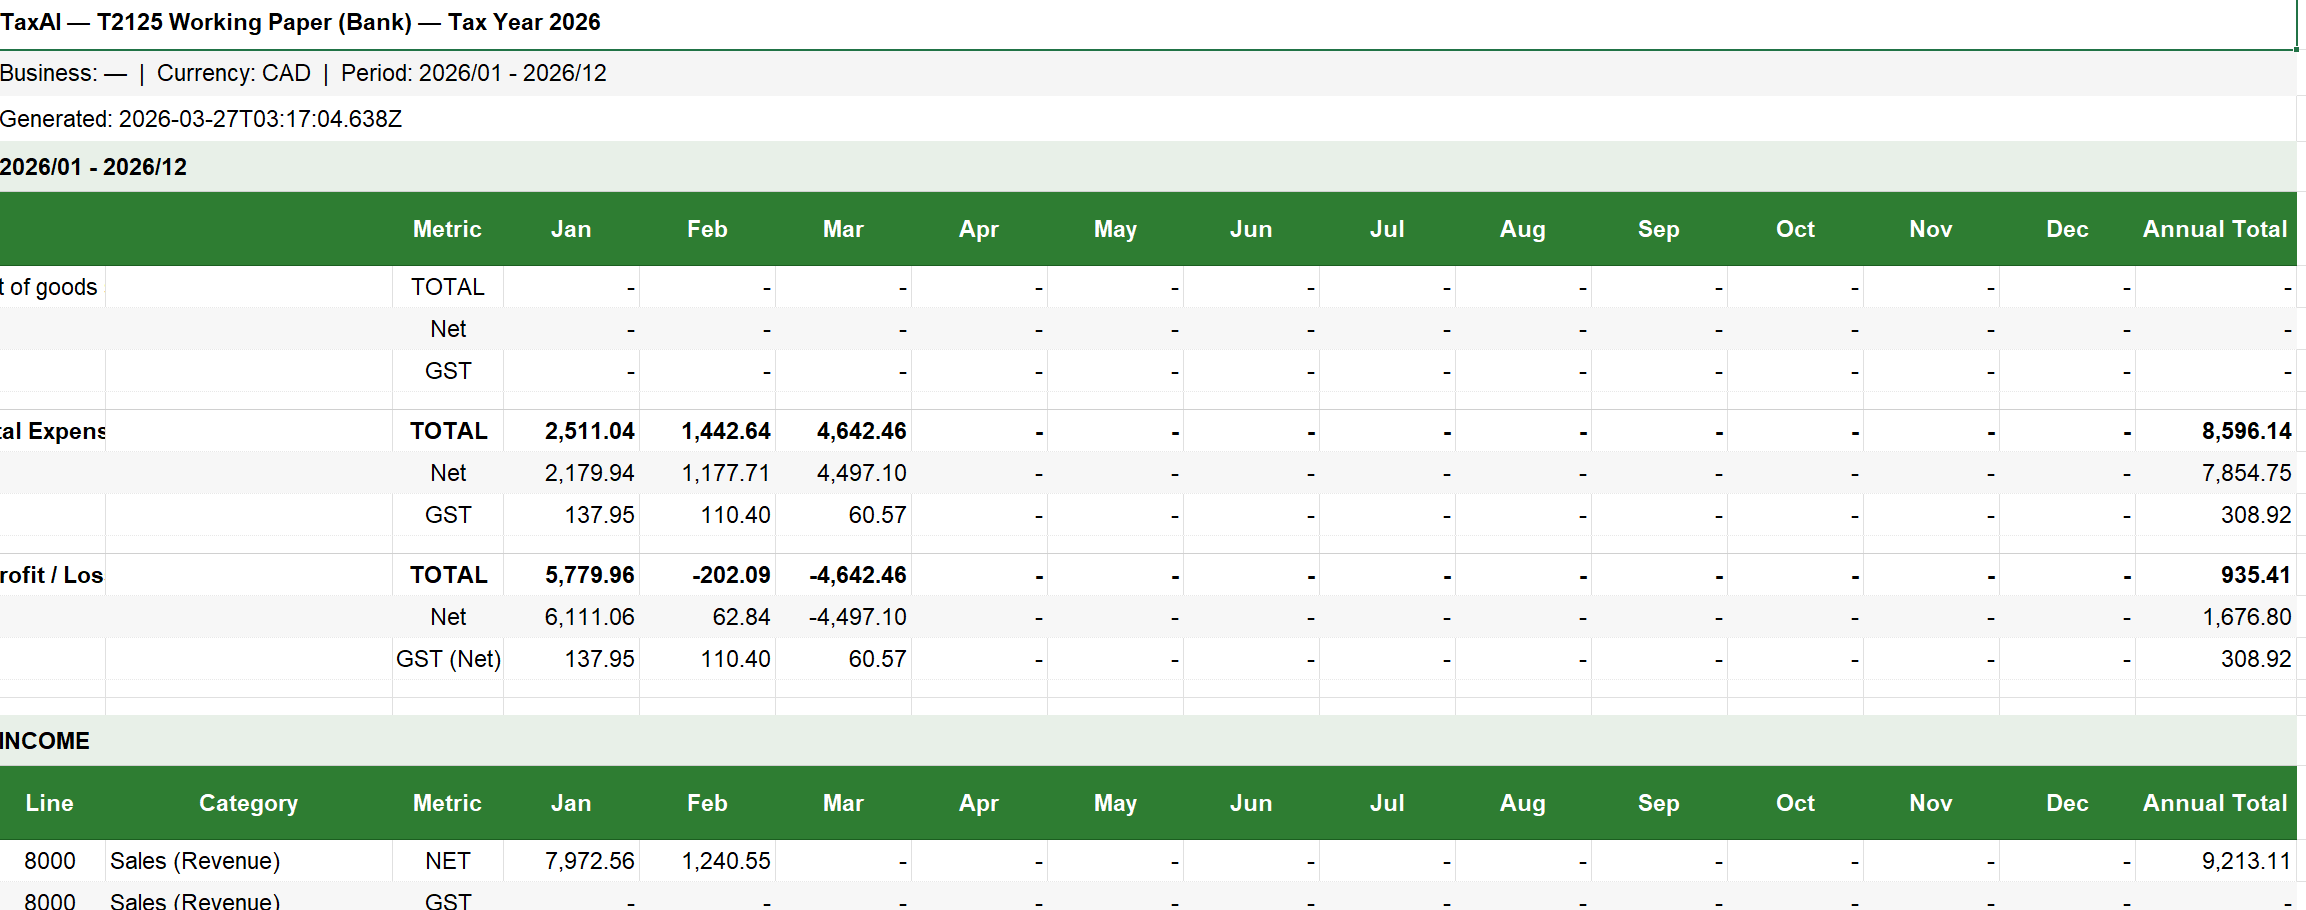
- Export T2125 / GST / T776 (rental) reports
- Review classification results
- Confirm or adjust categories
- Finalize all entries
- Share your referral code
- Earn points when others subscribe
- Redeem rewards
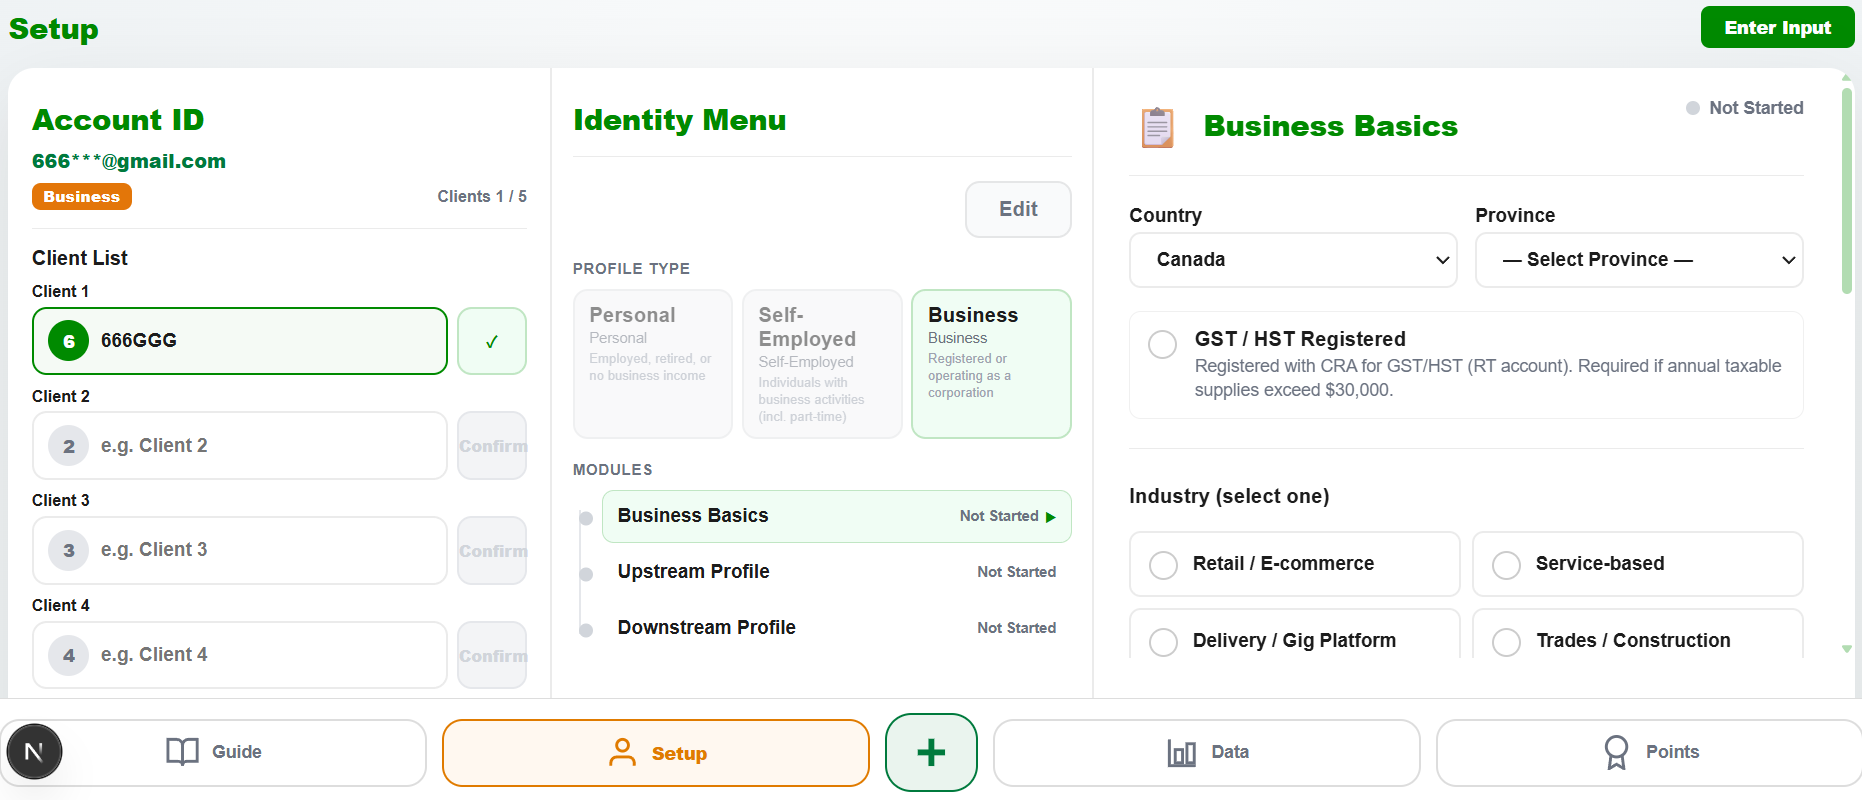
Setup your business profile
Enter your business details, tax information, and industry context. The more complete your profile, the better the AI classification accuracy across all your transactions.
Step-by-step workflow
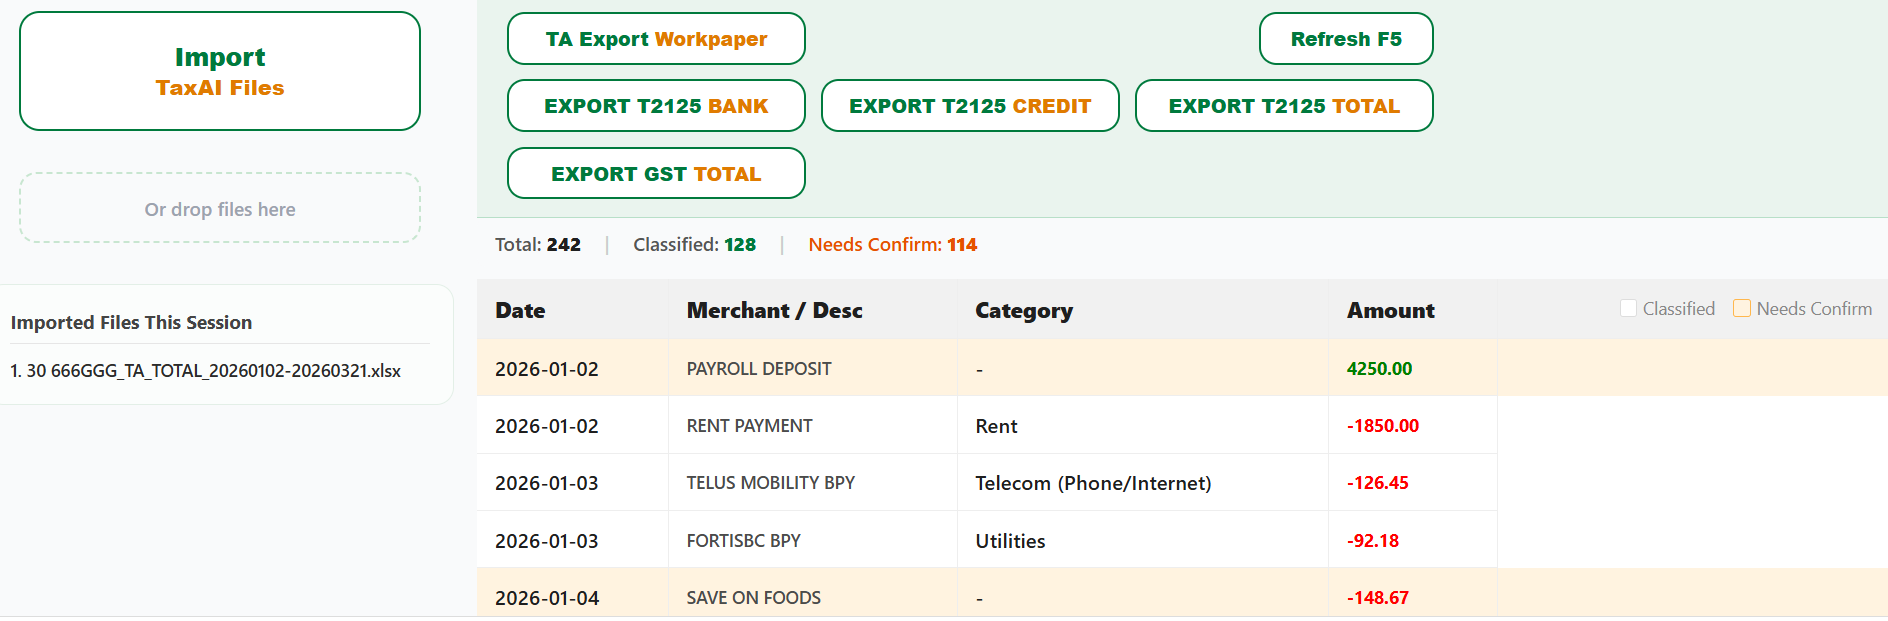
Review & classify with AI
The Data workspace combines AI-suggested categories with your manual review. Sort, filter, confirm or adjust classifications — then generate GST and T2125 working papers when ready.

Common questions
Quick answers to help you get started with TaxAI.